DIY
Alright, so admittedly, I've never been the best at crafts. HOWEVER, I have always enjoyed doing the few crafty things that I have attempted and I'm enough of a perfectionist that I think they'll turn out alright. Plus, along with with that perfectionist mentally, I'm also kind of a control freak so I don't think I'd like to turn over the design to someone else, anyway. :-)
Our Kickbutt, Nontraditional Slideshow
Trust me, it's worth a watch! We took inspiration from fellow MSP knottie Debbieupper's slideshow. FI did such a good job, I just told him the ideas, shared the inspiration video with him, helped him pick out and find the celebrity videos, and put the music in. The rest he put together on his own. We put ours together in Photoshop Premier. It takes awhile to learn but is super amazing and customizable once you get it down.
http://vimeo.com/28329462
http://vimeo.com/28329462
Ceremony Wreathes
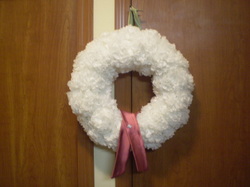
I made these kind of last minute after going to our final meeting at our church and seeing the big, beautiful front doors one last time. I had an instinct that they needed something on them and, though my finace disagreed, I started the project. I followed the directions on THIS website but made 8'x4' rectangles instead of the larger size they suggest because they were easier to work with. I also didn't need to use an upholstery needle as instructed, I just did a band of hot glue around the bottom of the flower (to ensure they stayed in) and then pushed the wire into the foam wreath (I used two 12" wreathes from Crafts Direct's flower section). I then hotglued and pinned the green ribbon on the back to hang the wreathes by and used some of the fabric leftover from the flower girl sashes my FMIL made for the pink ribbon at the bottom. I then used a pair of vintage-y looking earrings my mom had gotten me that I never wear and stuck that in the middle of the pink ribbon. They don't show up well in the picture but they look perfect in person! This project was super easy and turned out great, but I won't lie: It's VERY time consuming!
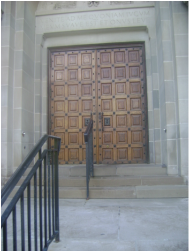
The chapel doors the wreaths will hang on
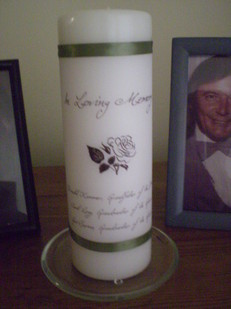
Memorial Candle and Pictures
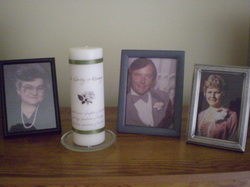
I also decided on this kind of last minute. My grandpa passed away from cancer early last year and I decided I really wanted to do something to make him a part of the day. When I mentioned it to Jon, he agreed and wanted to honor both of his grandmothers, as well. I made the candle the same way I made the unity candle (instructions below) and then we had our parents pick photos of each of the relatives and bought some cheap, homey frames from the dollar store. A close up of the candle is below. It just says "In Loving Memory" and then lists each of the three relatives and their relation to us.
Various Signs
These I put together in photoshop and shopped at Big Lots and Goodwill for some frames that I spray painted navy blue. Pretty simple. The candy buffet one I mimicked the design we used on the candy buffet box labels.
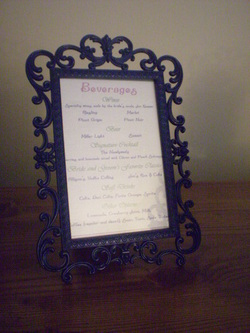
Bar Signs
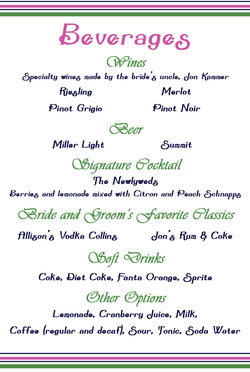
The Bar Sign Design
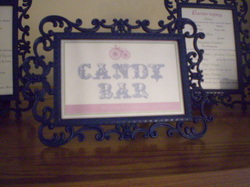
Candy Buffet Sign
Bathroom Basket Signs
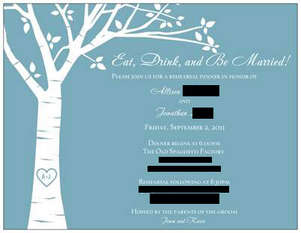
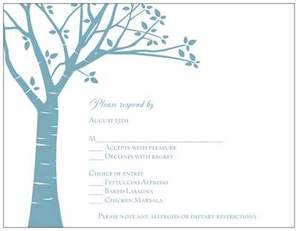
Rehearsal Dinner Invites, etc.
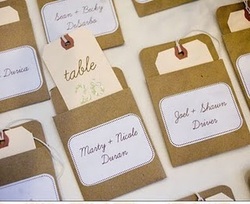
So while this isn't EXACTLY DIY since all I really did was spend 4 hours on Vistaprint playing with different templates and themes and I'm just ordering off of there, I'll still put it in this section. I also put Jon in charge of getting the placecard holders made (inspiration picture below) and he and his uncle teamed up to make beautiful wood holders. Here's the final pick per the future-in-laws:
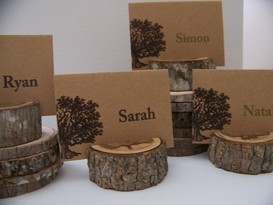
Inspiration for the place card holders
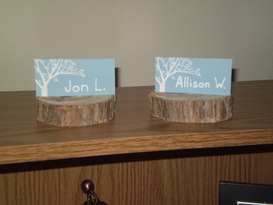
Actual place card holders all finished!
Place Card

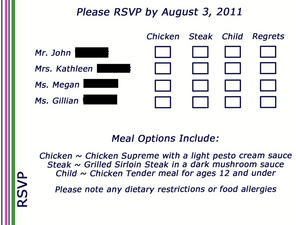
Menu Card
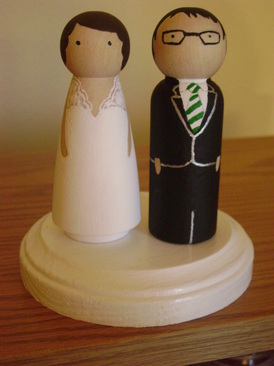
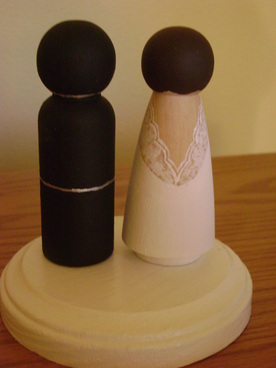
Cake Topper
I am SO proud of this! I became obsessed with these cake toppers I was seeing all over Martha Stewart, Style Me Pretty, etc., etc., etc. from etsy seller goosegreese (click to see her shop) but I felt a little ill at the thought of forking over $110. Then one day I saw that the seller also offered a DIY kit that came with the bride and groom wood figurine, 5 different color paints, at top coat for $16 and I thought "what the hell" and decided to give it a try. While looking at inspiration pictures on her store site, I spent two days painting the little figurines and I'm THRILLED with the results and saved myself $95. They send two paint brushes with, but I recommend painting most of it with a toothpick since they are so tiny. Also, draw everything in pencil first and do one part at a time, let it dry, then start on the next part. Jon loves his miny-him but he doesn't get to see the mini-me 'til the wedding since it looks so much like my dress!
Escort Cards
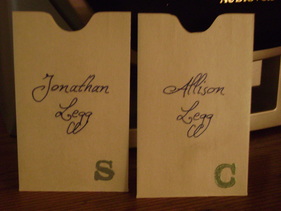
Such a simple, easy (yet time consuming) project, and it's definitely in my top 3 favorite results so far. I absolutely LOVE them. My inspiration picture for escort cards is below, and off of that I came up with the design. I printed "table" on quartz stardream cardstock, cut them down to the size and shape I wanted, then punched a hole in the top. I used the Cricut machine from Jon's work to cut out the numbers from green and white poka-dot cardstock and ran them through the Xyron machine to make them stick to the cards. For the "punch protector" I could only find plain white sheets, so I ran the sheet of white circles through my printer and printed the color pink I wanted on it, then applied it around the punched hole. The mini envelopes pictured (purchased from envelopemall.com) have the guest's name handwritten on in dark blue ink (as shown below), with a letter embossed in the corner corresponding to their meal choice. The envelopes are attached to the escort card board by dark blue pins, like in the inspiration picture below. We ended up filling three boards for 193 guests (not including the bartenders and the head table).
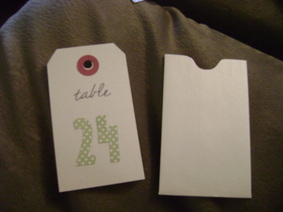
Escort Card and Envelope
Envelope Mock-Ups
Escort Board Inspiration
Escort Card Inspiration
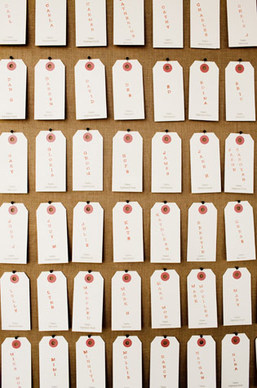
Escort Card Boards
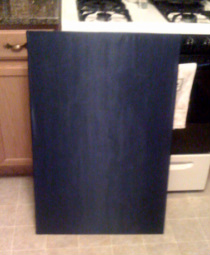
Not the best picture, but you get the idea...
For the escort card boards I bought three Styrofoam presentation boards at Walmart and a navy satin fabric. With some help from FFIL and FBIL, we spray glued the boards, laid down the fabric and pushed out any bubbles or wrinkles, then put in small push pins on each of the 4 edges to ensure the cloth stayed taught. We then used packing tape on the back to affix the extra cloth to the back of the boards. It was a bigger project than anticipated but they turned out gorgeous! We ended up filling all three boards we made for 193 guests (not including the bartenders and the head table).
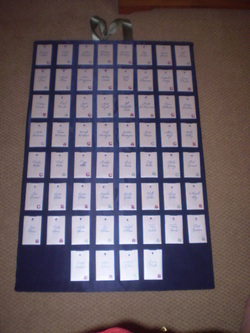
All assembled!
Bathroom Baskets
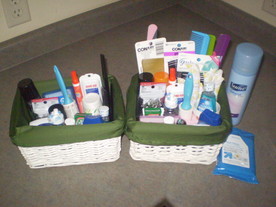
I purchased the baskets from a fellow knottie, had FMIL make the liners to match our colors, and then purchased all the supplies at Target. The list of included items is below.
Men's
Tylenol
Q-Tips
Breath Mints
Mouth wash
Dixie Cups
Contact lens solution
Tide to-go sticks
Hand lotion
Dental Floss
Deodorant Spray
Eye Drops
Safety Pins
Band-Aids
Tums
Hairspray
Disposable combs
Vaseline
Tylenol
Q-Tips
Breath Mints
Mouth wash
Dixie Cups
Contact lens solution
Tide to-go sticks
Hand lotion
Dental Floss
Deodorant Spray
Eye Drops
Safety Pins
Band-Aids
Tums
Hairspray
Disposable combs
Vaseline
Women's
Tylenol
Hairspray
Q-Tips
Bobby Pins
Breath Mints
Mouth wash
Dixie Cups
Contact lens solution
Tide to-go sticks
Nail file
Tampons
Sanitary Napkins
Hand Lotion
Vaseline
Dental Floss
Deodorant Spray
Eye Drops
Hair Elastics
Safety Pins
Band-Aids
Tums
Disposable combs
Static Guard
Clear Nail Polish
Tylenol
Hairspray
Q-Tips
Bobby Pins
Breath Mints
Mouth wash
Dixie Cups
Contact lens solution
Tide to-go sticks
Nail file
Tampons
Sanitary Napkins
Hand Lotion
Vaseline
Dental Floss
Deodorant Spray
Eye Drops
Hair Elastics
Safety Pins
Band-Aids
Tums
Disposable combs
Static Guard
Clear Nail Polish
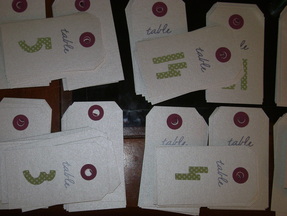
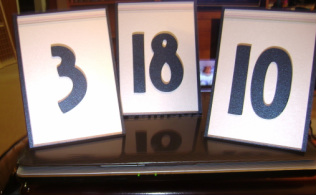
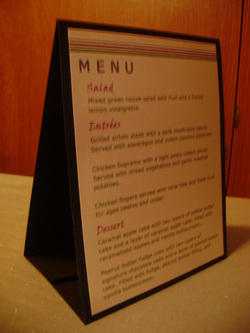
Table Numbers
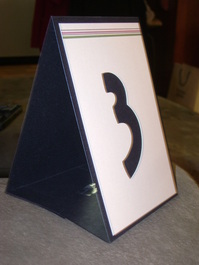
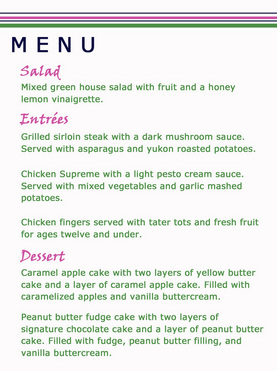
For these I simply used the leftover pocketfold invites, disconnected the pocket, and taped it to the flap to make a tent. I then printed the stripe design that appears throughout our stationary onto quartz stardream cardstock and ran it through the Cricut machine from Jon's work to cut out the number. Double sided tape and rubber cement attached it to the pocketfold. On the back side I attached a menu since Jon was against printing individual menus for everyone.
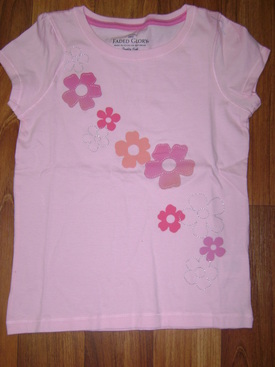
Flower Girl T-Shirts
I just couldn't justify spending $20 a piece on each of the three flower girl t-shirts. So instead I went to Crafts Direct and got "flower girl" iron transfers for $3.50 a piece and then found the perfect shirts at Walmart on sale for $3.50 a piece. SO cute!
Before
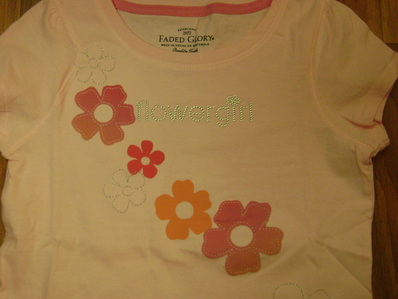
After!
Transportation Cards
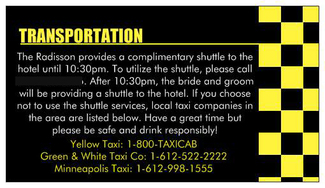
I made 250 of these for free on Vistaprint to put on the bar at the reception to make sure our guests get a safe way home.
Car Magnet
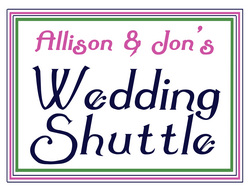
I designed and ordered a free car magnet off of Vistaprint for each side of our guest shuttle. Since we went with just a simple black car for our shuttle, I wanted something to make it stick out to guests.
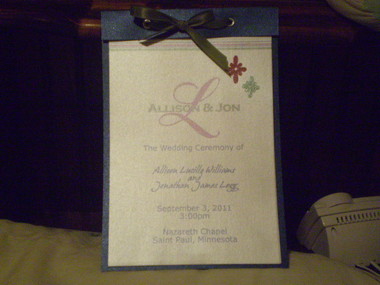
Programs
I've had these done on the computer since about 7 months out. Now they're all printed and assembled and looking fabulous 2.5 months out. I printed and sprayed all four pages as explained under the invites section. Then Jon cut out all of the blue bases, I embossed the flower design on the cover, and then we used the croc-a-dile punch to insert the eyelets and we tied green ribbon through the holes. I LOVE THEM!
Invites
At eight months out they are all done besides the RSVP cards and addressing the envelopes! At four months out they are FINISHED!
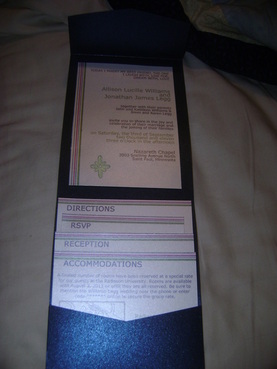
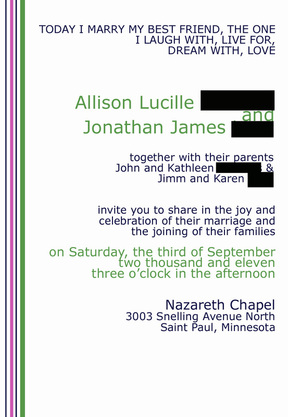
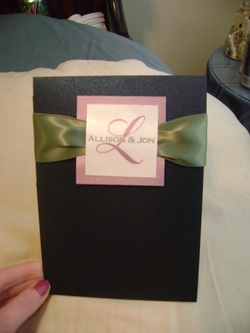
We got stardream paper in Quartz for the actual invite and inserts, I embossed the little green flower design in the bottom left hand corner, invested in a Xyron machine ($14 including tax at Michael's with my 40% off coupon!) for the belly bands, and used a matte fixative spray (used for charcoal drawings, etc.) on everything that was printed off my inkjet printer to prevent smudging and running on the stardream paper.
The spray worked really well! Before we sprayed it, FI would run his hand over the paper when cutting it and the whole thing would smear. After the spray, I could get my hands wet in the sink and run my fingers over the ink and it'd stay perfectly perfect.
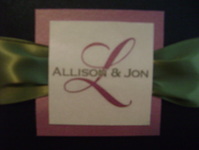
For the belly bands I used this KNOTTIE BIO for instructions. I just used regular tape to tape the ribbon so that it tapered in, used double sided scotch tape to tape the ribbon to the bottom layer (pink sheet) and ran the monogram portion through my new Xyron machine. It worked really well.....for about a day. Then the monogram portion would start popping up, probably because the ribbon was so thick. After several trial runs and about 10 tests of different combos of glues and adhesives, Jon and I went back through all the belly bands, added a piece of double sided tape to the top and bottom portions of the monogram portion and then Jon put a t-shirt over the belly band and ironed the monogram portion to flatten it down. This is the ONLY thing we found that worked and now, 6 weeks later, none of the monograms have popped up. Thank goodness!
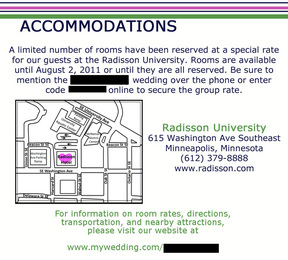
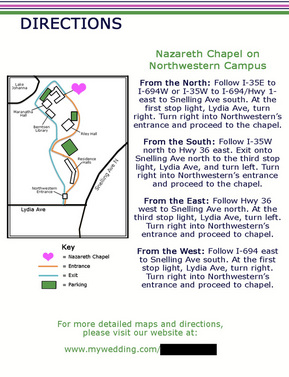
I also made the maps myself, which was kind of a PITA especially because my ceremony site is on a college campus and the exact location of the chapel doesn't show up on any map searches. To make them, I just found a map that I liked on mapquest, google maps, or the website of the location, hit the print screen button on my computer (PRTSC), copied it into powerpoint, cropped it down to size, and then drew lines over everything that I wanted to include on my map. I then deleted the picture and voila, instant map. Well not instant, more like a couple hours for the three of them, but you know what I mean :-)
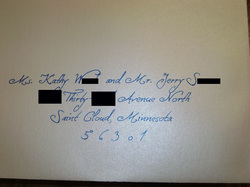
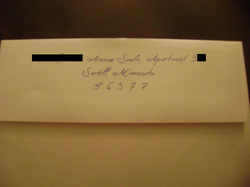
For the envelopes we bought stardream envelopes (for a whopping $17 per 100 off of envelopemall.com!) We ended up printing the address onto the envelope in a very light grey and then I traced over it with a blue calligraphy pen. If you're thinking about going this route, I HIGHLY recommend it. They are stunning, weren't THAT much work, and it looks like we spent a ton on a calligrapher when it was all homemade. And it cost practically nothing! After printing 120 envelopes, we went through barelly no ink.
If you're curioius about the full cost break down, here ya be!:
200 Quartz Stardream A7 Envelopes from envelopemall.com (including shipping): $38.64
150 Dark Blue Metallic A7 Cascade Pocketfolds form paperandmore.com (including shipping) minus the 30 pocketfolds that I used for table number tents: $103.97 (cost for all 150 = $129.96)
150 Sheets of 8.5x11" Text-Thickness (a little more flimsy, for actual invites) Quartz Stardream Paper and 300 Sheets of 8.5x11" Cover-Thickness (a thick cardstock, for inserts) from Anchor Paper
(including shipping): $117.67 (actual cost of sheets used is probably less since I had a bunch left over to use for programs, etc)
Xyron machine with permanent adhesive (with 40% off coupon): $14.87
Custom stamp (for embossing) from etsy seller JLMould (including shipping): $10.00
50 Yards of Offray Single Face Satin Ribbon in Moss (including shippin): $28.53 (with tons left over)
Ultra Green Pearl (Opaque) Embossing Powder from embossingcandystore.com (including shipping): $3.75
112- 64 cent Stamps for Invites: $71.68
112- 29 cent Stamps for RSVP Postcards: $32.48
Total Cost: $421.59
Total Cost per Invite (112): $3.76
We got stardream paper in Quartz for the actual invite and inserts, I embossed the little green flower design in the bottom left hand corner, invested in a Xyron machine ($14 including tax at Michael's with my 40% off coupon!) for the belly bands, and used a matte fixative spray (used for charcoal drawings, etc.) on everything that was printed off my inkjet printer to prevent smudging and running on the stardream paper.
The spray worked really well! Before we sprayed it, FI would run his hand over the paper when cutting it and the whole thing would smear. After the spray, I could get my hands wet in the sink and run my fingers over the ink and it'd stay perfectly perfect.
For the belly bands I used this KNOTTIE BIO for instructions. I just used regular tape to tape the ribbon so that it tapered in, used double sided scotch tape to tape the ribbon to the bottom layer (pink sheet) and ran the monogram portion through my new Xyron machine. It worked really well.....for about a day. Then the monogram portion would start popping up, probably because the ribbon was so thick. After several trial runs and about 10 tests of different combos of glues and adhesives, Jon and I went back through all the belly bands, added a piece of double sided tape to the top and bottom portions of the monogram portion and then Jon put a t-shirt over the belly band and ironed the monogram portion to flatten it down. This is the ONLY thing we found that worked and now, 6 weeks later, none of the monograms have popped up. Thank goodness!
I also made the maps myself, which was kind of a PITA especially because my ceremony site is on a college campus and the exact location of the chapel doesn't show up on any map searches. To make them, I just found a map that I liked on mapquest, google maps, or the website of the location, hit the print screen button on my computer (PRTSC), copied it into powerpoint, cropped it down to size, and then drew lines over everything that I wanted to include on my map. I then deleted the picture and voila, instant map. Well not instant, more like a couple hours for the three of them, but you know what I mean :-)
For the envelopes we bought stardream envelopes (for a whopping $17 per 100 off of envelopemall.com!) We ended up printing the address onto the envelope in a very light grey and then I traced over it with a blue calligraphy pen. If you're thinking about going this route, I HIGHLY recommend it. They are stunning, weren't THAT much work, and it looks like we spent a ton on a calligrapher when it was all homemade. And it cost practically nothing! After printing 120 envelopes, we went through barelly no ink.
If you're curioius about the full cost break down, here ya be!:
200 Quartz Stardream A7 Envelopes from envelopemall.com (including shipping): $38.64
150 Dark Blue Metallic A7 Cascade Pocketfolds form paperandmore.com (including shipping) minus the 30 pocketfolds that I used for table number tents: $103.97 (cost for all 150 = $129.96)
150 Sheets of 8.5x11" Text-Thickness (a little more flimsy, for actual invites) Quartz Stardream Paper and 300 Sheets of 8.5x11" Cover-Thickness (a thick cardstock, for inserts) from Anchor Paper
(including shipping): $117.67 (actual cost of sheets used is probably less since I had a bunch left over to use for programs, etc)
Xyron machine with permanent adhesive (with 40% off coupon): $14.87
Custom stamp (for embossing) from etsy seller JLMould (including shipping): $10.00
50 Yards of Offray Single Face Satin Ribbon in Moss (including shippin): $28.53 (with tons left over)
Ultra Green Pearl (Opaque) Embossing Powder from embossingcandystore.com (including shipping): $3.75
112- 64 cent Stamps for Invites: $71.68
112- 29 cent Stamps for RSVP Postcards: $32.48
Total Cost: $421.59
Total Cost per Invite (112): $3.76
Beginnings of the Welcome Baskets
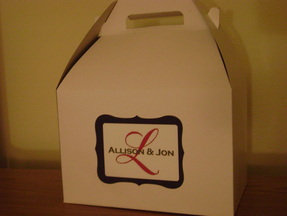
I've started on a couple of things for the welcome baskets to give OOT guests in their hotel room. I still need to buy stuff to put in it (planning on water, snacks, maybe a mini bottle of champagne, pain releavers, etc.) but here's a preview of the box, welcome brochure, and door hangers I made. The welcome brochures are from Vistaprint (25 free!) and I actually just ended up using one of their templates because it was too much of a pain to find my own background and play around with spacing in photoshop. The door hangers I found a template online, redesigned them, and then printed them on pink cardstock. The playing cards I purchased in bulk offline and then attached stickers with our name and date on the boxes. The gable boxes I bought off of uline.com for super cheap, then I printed our monogram with a blue border on sticker paper and used Jon's work's cricuit machine to cut it out in the fun shape. The boxes include:
*The brochure that has the timeline, directions to the chapel, a welcome note, a note about brunch in our room the next day, and fun restaurants/attractions in the area (see below)
*Door hangers (see below)
*Pack of cards (see below)
*Two bottles of water
*Chex Mix
*Two raspberry Lindor truffles
*Keebler cookies
*Cheez Its
*Mini bottle of Cooks sparkling wine
*Two 2-tablet packs of extra strength Tylenol
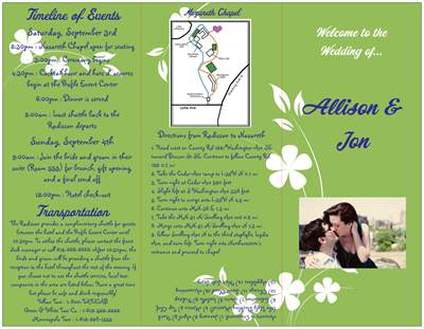
Outside of Welcome Brochure
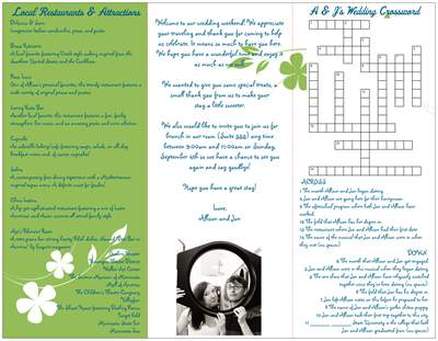
Inside of Welcome Brochure
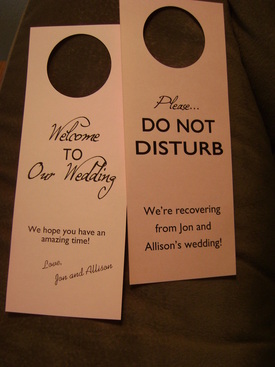
Adorable door hangers
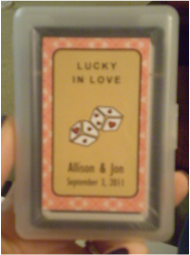
Playing Cards
Unity Candle
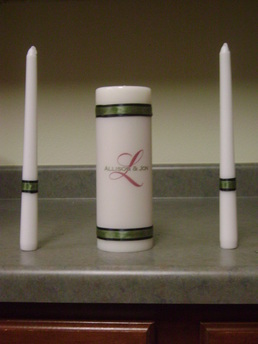
I bought a pillar candle and two tapered candles from walmart. I printed our monogram onto vellum paper, hot glued it to the pillar candle, and then hot glued a strip of navy blue ribbon onto the edges of the vellum and on the bottom of each tapered candle. I then hot glued a strip of moss colored ribbon onto each strip of navy ribbon and voila! Super easy and super cheap but a great detail.
Guestbook Sign
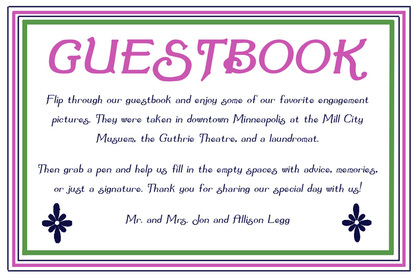
I designed this in photoshop and ordered it for free (as a small lawn sign) off of vistaprint. Super easy, super cheap, and a great way to point out that the photobook should be used as a guestbook so people don't confused.
Candy Buffet Boxes
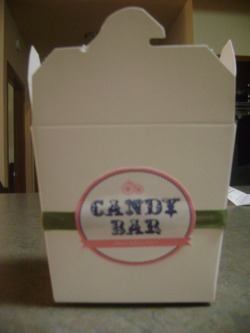
I got the take out boxes from Papermart.com for a ridiculously low price. I then made the stickers from a design off of theweddingchicks.com. I hot glued the ribbon on to the boxes (glue dots didn't stick to the ribbon as well as I would have liked) and put the stickers over it. Honestly, the hardest part about this project was simply cutting out the stickers. It took FOREVER!
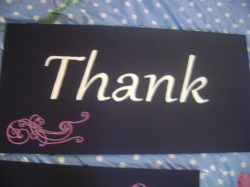
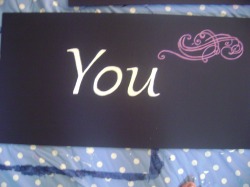
Thank You Sign (for pictures)
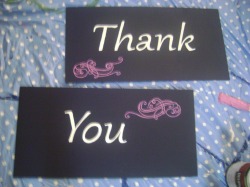
I made these to use in pictures the day of to put on our Thank You cards. I picked out a text that I liked, blew it up to print over several pages in Excel, and then put packing tape on both sides of the paper to make it thicker and more stencil-like so the paper wouldn't tear when I was cutting. I then used a box cutter (I couldn't find my exacto knife, but that would probably be easier) and cut out the letters (picture below). The design was too small and intricate to cut out so I ended up freehanding (with help from FI). I then painted the white and pink letters/designs, let them dry, then painted the blue around it. I recommend doing a lighter color on the background and darker for the letters so you can do the background first because painting around everything was a PITA!
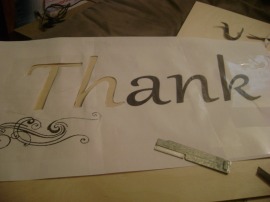
My stencil in progress
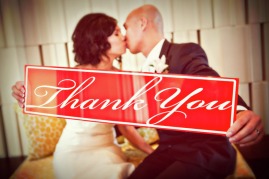
Inspiration Picture
Aisle Runner
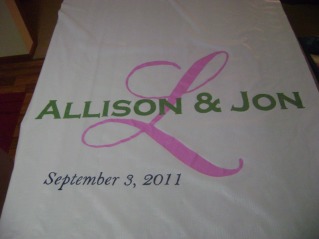
I handpainted our monogram onto our aisle runner that I got for $20 with a half off coupon from Michaels. Used the instructions from this KNOTTIE BIO. The monogram will sit at the back of the church and I can't wait to see how it will look in our chapel. LOVE!
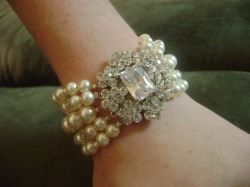
Bridesmaids' Haute Bracelets
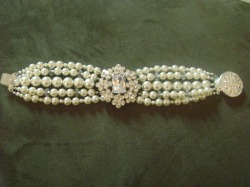
Love love LOVE how they turned out! I followed the instructions off of this KNOTTIE BIO, bought my beads off of fusionbeads.com, the brooches from ebay seller Lafancybeads, and the clasps off amazon.com seller Beadaholic. The only major modification I had to make was that I picked out brooches that didn't have enough spots on the sides to lace the wire through, so we found earring bases at Michaels that had 5 loops on the end, and FI cut the pin off the back of the brooches and soldered the earrings to the the back of the brooches so we'd have something to link the wire to the brooches (see picture below). It was a TON of work but so worth it!
Clasp
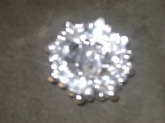
Back of brooch before earrings
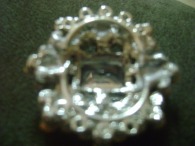
Back of brooch wtih soldered earrings
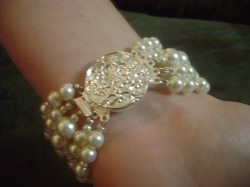
Junior Bridesmaids' and Personal Attendant's Bracelets
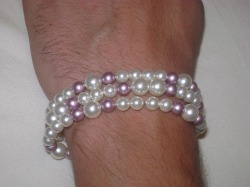
FI modeling the bracelet :-)
Loving these, too! The rose colored pearls' color doesn't show up great on my camera, but it's so pretty in person! Got the supplies from the same places listed above.
Flower Girls' Necklaces
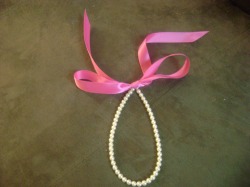
These turned out way too freaking adorable! And they were SO easy! Got the beads from fusionbeads.com and followed the instructions off of this KNOTTIE BIO
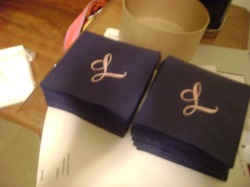
Embossed Napkins
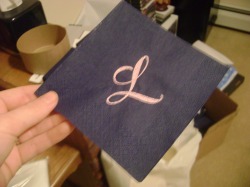
I thought this project would be much easier then it turned out to be. It took awhile to get the hang of, and I ended up having to buy an embossing buddy to keep the powder from sticking to the napkins. Once I did that I was able to get through them a little faster, but it still took about 2 full days to emboss 300 napkins. I used this KNOTTIE BIO for instructions, but don't be fooled by how easy she makes it seem ;-)
My stamp, embossing powder, and ink
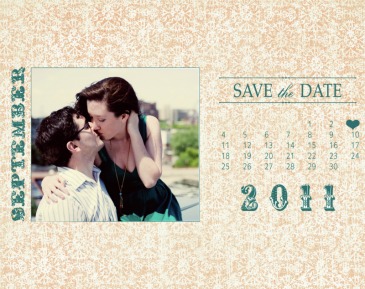
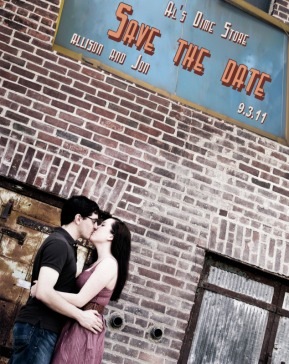
Save the Date
After designing about 10 different options, I finally decided to call it quits and just decide on one. I got it narrowed down to 3 front runners....
Option 1

Option 2
And the winner!
Front
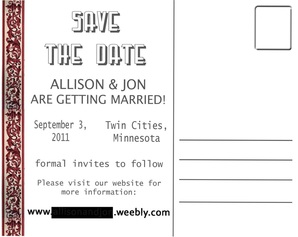
Back
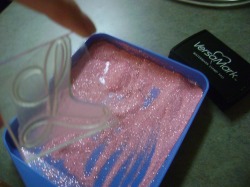
Card Box
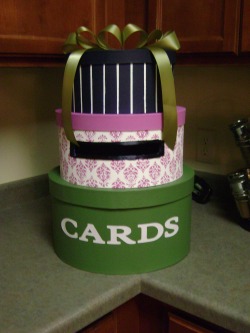
This took me 4 days to make and I'm absolutely thrilled with the way it turned out. I hand painted the whole thing and I think it looks amazing (especially considering I'm no artist)! Seriously, if I can do this, anyone can.
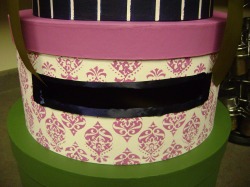
Close up of the middle box.
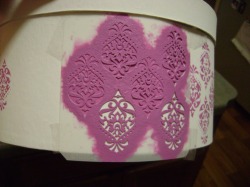
Stenciling on the design=MUCH more difficult and time consuming then I anticipated!
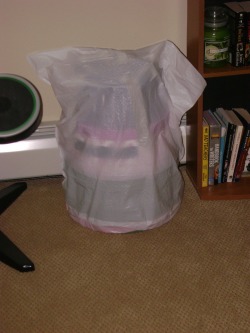
It's now being stored in a garbage bag in the den to prevent dust from accumulating on it over the next 15 months.
Photo Guestbook

CLICK HERE TO VIEW MY PHOTO GUESTBOOK
I used our engagement pictures to make a photo guestbook on shutterfly.com. I didn't use any of the templates on Shutterfly, though that probably would have made my life a lot easier. Instead I searched for templates and backgrounds that fit the vibe I was going for and slowly pieced it all together in photoshop. I'm absolutely thrilled with the way it turned out and it's even more amazing in person. I think it will be a great way to showcase all of our engagement pictures and it will be more likely that we'll actually look at our guestbook after our wedding.
I used our engagement pictures to make a photo guestbook on shutterfly.com. I didn't use any of the templates on Shutterfly, though that probably would have made my life a lot easier. Instead I searched for templates and backgrounds that fit the vibe I was going for and slowly pieced it all together in photoshop. I'm absolutely thrilled with the way it turned out and it's even more amazing in person. I think it will be a great way to showcase all of our engagement pictures and it will be more likely that we'll actually look at our guestbook after our wedding.
Personalized Hanger
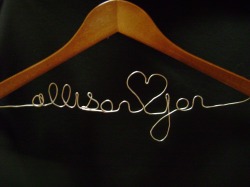
After two hours of work and several failed attempts, it finally turned out perfectly! I couldn't be happier with it. I bought 12 gauge wire from Michaels and the wooden hanger from Target.
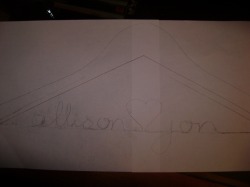
First, I traced the hanger onto some paper and drew out exactly how I wanted the lettering to look. I used this esty seller's website for inspiration on how to do the letters: http://www.etsy.com/listing/28217114/the-original-eight-inch-personalized
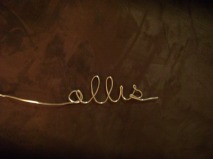
I then used needle-nosed pliers to get the tight curves of the letters...but on my first attempt I got a little too excited and broke the wire after the "s". Whoops.

I then started to get frustrated and ended up with some not so pretty results.
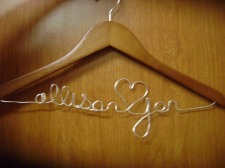
I finally calmed down enough to focus and, with some help from the fiance, finished the lettering, drilled holes into the hanger with a 5/64th drill bit, and glued the wire in with some craft glue just to be safe!
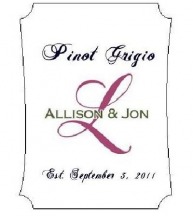
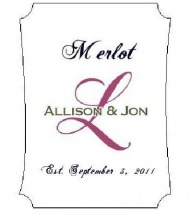
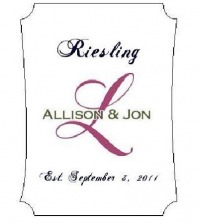
Wine Labels
Jon and I are lucky enough to have my amazing uncle making all of our wine for our reception. He gave us a bunch of templates to pick from for the labels, but we ended up just designing a simple one of our own. Here's our design for the 4 wines we've picked out.
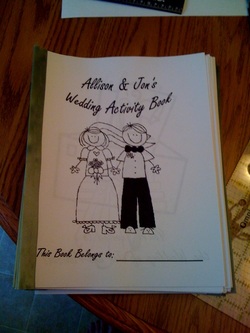
Kids' Activity Book
I put together an activity book for the kids at the reception with some inspiration from other knotties and some various templates. We printed them off at Jon’s work, stapled down the edges, then I took some leftover satin ribbon from the belly bands and hot glued them to the binding to give it a more finished look.
Click below to download the book that I created.
Click below to download the book that I created.
| coloring_book_condensed.pub |
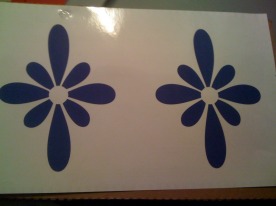
Window Clings
Our venue's windows looking in at our reception hall
Our reception venue has three big windows that I made window clings for. I designed them and printed them on Vistaprint for only $12 total. The center, rounded window will have the larger monogram window cling and the two side, rectangle windows will have the smaller flower design window clings.
Candy Buffet
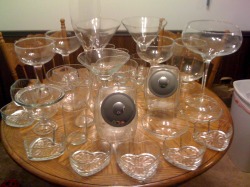
Not EXACTLY DIY, but here's a picture of the amazing candy buffet setup we got for a steal! Super excited about this! I DIYed the boxes as well (see above)
Photo Sharing Cards
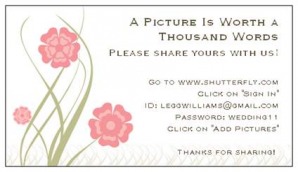
I printed 250 free business cards off of Vistaprint to have out at the reception and to include in the thank you cards.
Beginning of the Bridesmaid Gifts
As part of my bridesmaids' gifts, I'm utilizing Vistaprint once again to put together stationary kits for each of the bridesmaids. Each kit will include a pen, sticky notes, a notepad, ten thank you cards, a calander, a return address stamp, and a mug with a picture of the two of us. So far I have ordered one set and it turned out really nice and you can't beat the price ($5 for the mug, everything else free!) They are each personalized according to each girl's interests.
Bridesmaid #1: Beatles
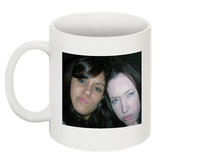
Photo Mug

Note Cards
Sticky Notes

Pen (last name blacked out)
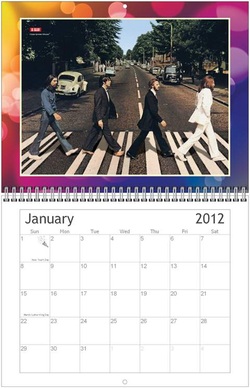
Calendar
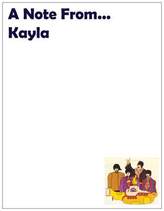
Notepad
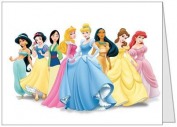
Bridesmaid #2: Disney Princess
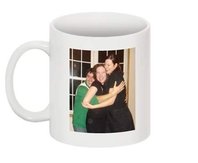
Photo Mug
Note Cards
Sticky Notes

Pen (last name blacked out)
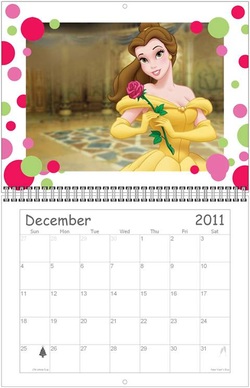
Calendar
Notepad
Bridesmaid #3: Theater
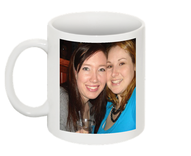
Photo Mug
Note Cards
Sticky Notes

Pen (last name blacked out)
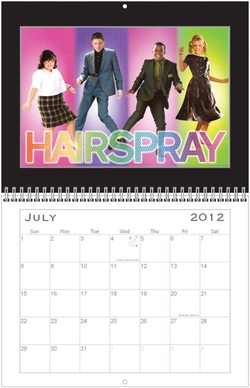
Calendar
Notepad
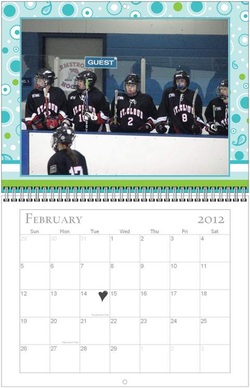
Bridesmaid #4: Hockey
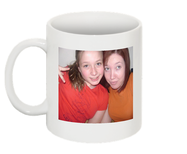
Photo Mug

Note Cards
Sticky Notes

Pen (last name blacked out)
Calendar

Notepad
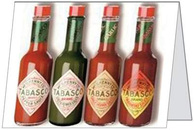
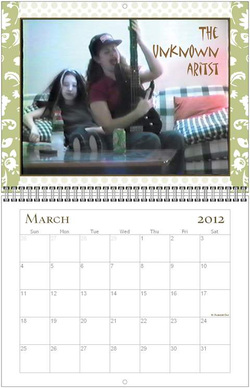
Bridesmaid #5: Hot Sauce/A Movie We Made in Junior High
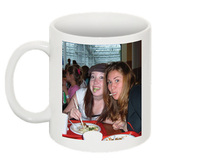
Photo Mug
Note Cards
Sticky Notes

Pen (last name blacked out)
Calendar
Notepad
